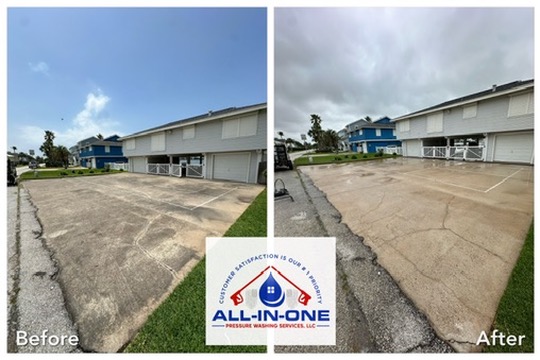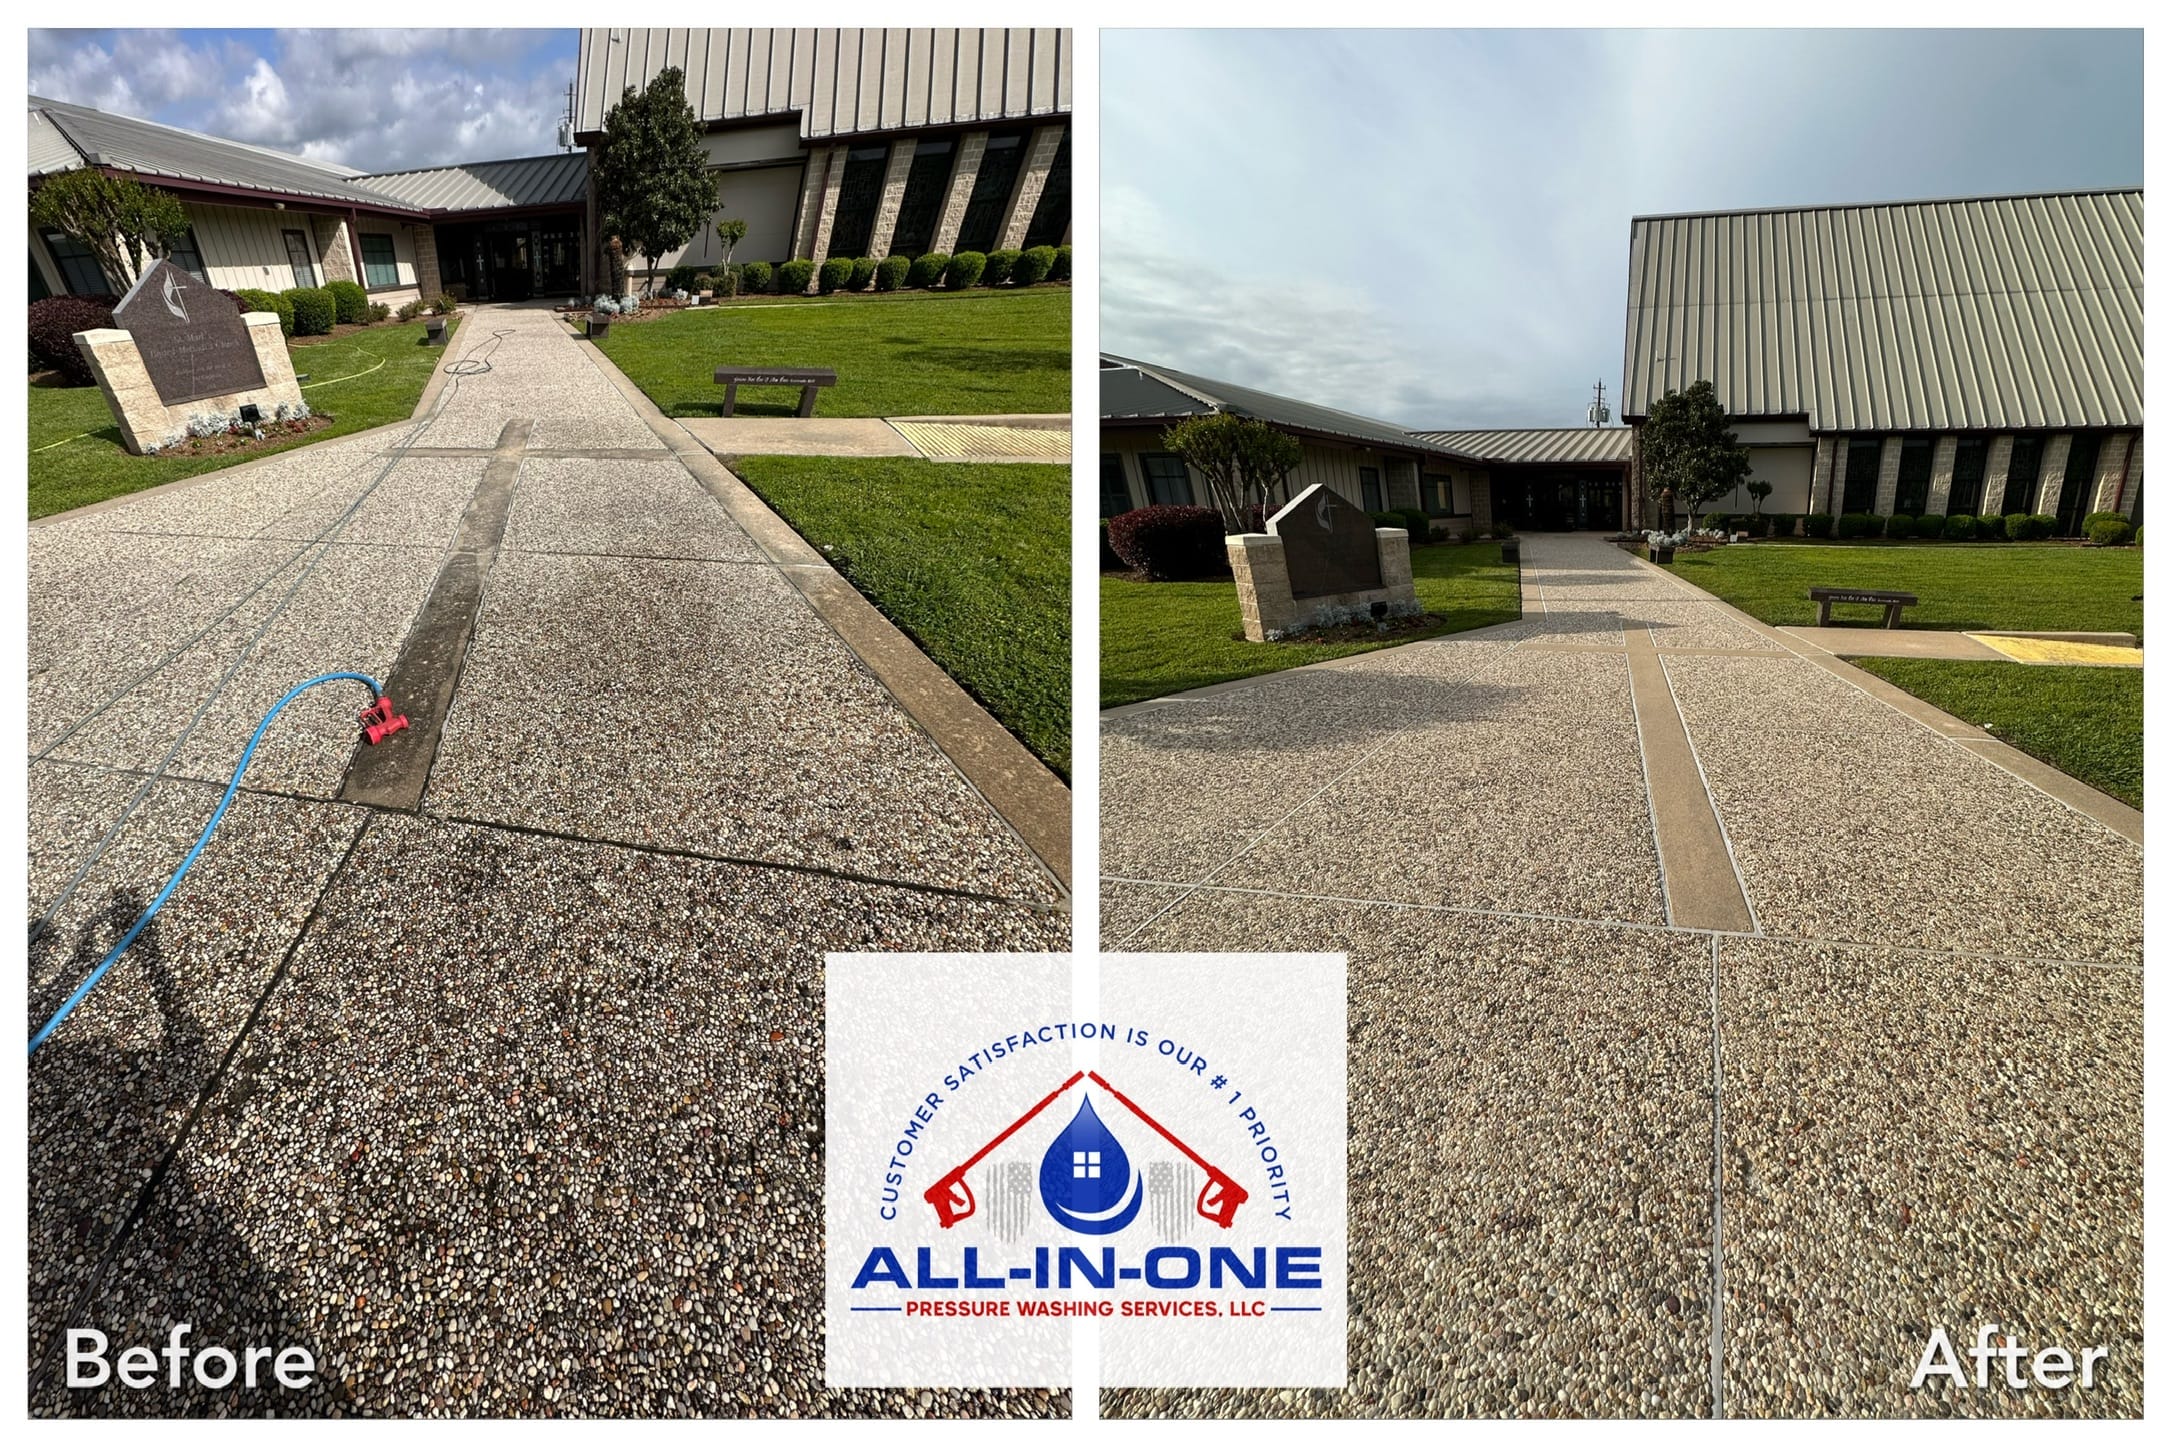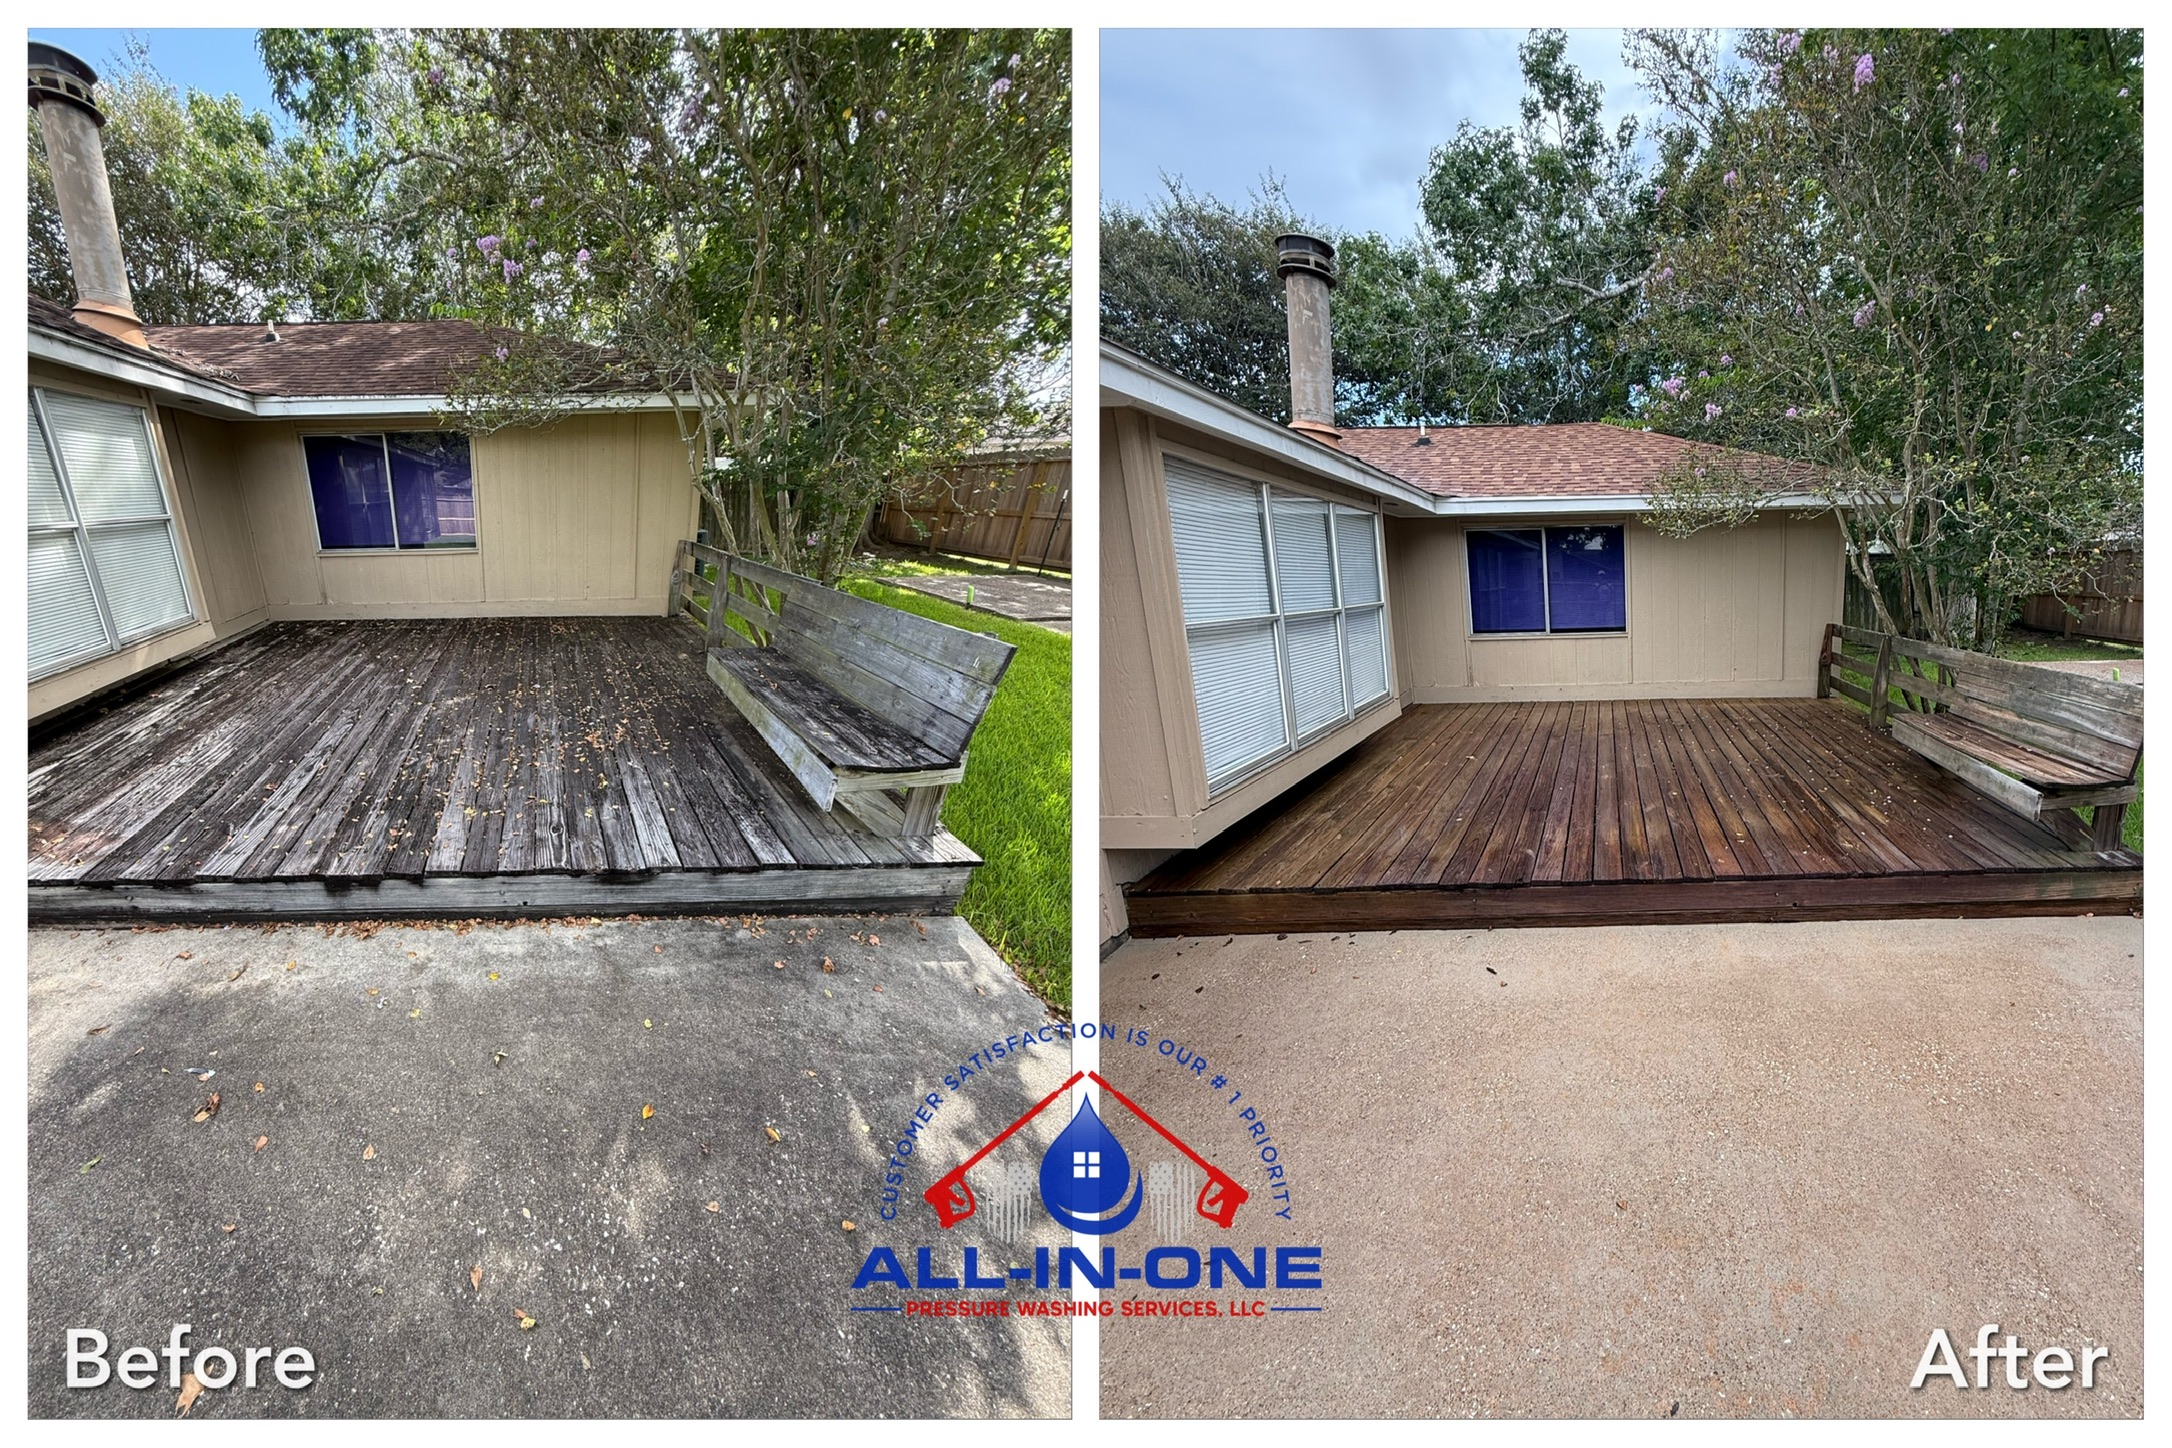
There’s nothing quite like stepping onto a freshly cleaned patio with a morning coffee in hand, feeling the smooth, grime-free surface beneath your feet. Over the years, we’ve seen countless patios transform from dull, stained, and weathered eyesores into stunning outdoor spaces that homeowners actually want to use again. If your patio has lost its luster, proper patio cleaning is the single most effective way to bring it back to life without spending a fortune on replacement pavers or concrete. In this guide, we’ll walk you through exactly how we deep clean a patio, what tools and techniques work best, and how you can achieve professional-quality results. Whether you’re tackling a weekend project yourself or considering hiring experts, you’ll learn everything you need to make your patio look brand new again.
Why Regular Patio Cleaning Matters More Than You Think
Your patio endures a relentless assault from the elements every single day. Rain, UV rays, foot traffic, falling leaves, and spilled food all contribute to a slow buildup of grime that dulls even the most beautiful stone or concrete. Over time, this neglect doesn’t just affect appearance—it can actually damage the surface and shorten its lifespan.
We often remind our clients that patio cleaning is as much about preservation as it is about aesthetics. Organic growth like algae, moss, and lichen traps moisture against the surface, which accelerates cracking, pitting, and discoloration. In colder climates, that trapped moisture freezes and expands, causing even more structural harm.
Here are the most common reasons a patio starts looking tired and worn:
- Algae and moss growth — thrives in shaded, damp areas and creates slippery green or black patches
- Mildew and mold — common in humid climates and health hazards for your family
- Grease and food stains — from grilling and outdoor dining
- Efflorescence — white, chalky mineral deposits on concrete and pavers
- Ground-in dirt and weeds — accumulating between joints and seams
Beyond looks, a slippery, algae-covered patio is a genuine safety risk. We’ve responded to many calls where homeowners realized their outdoor space had become hazardous. A simple deep clean can dramatically reduce slip-and-fall accidents, especially around pools and entryways. Investing a little time in maintenance now saves you from costly repairs and potential liability down the road.
Essential Tools and Supplies for a Deep Patio Clean
Before you start scrubbing, having the right equipment makes all the difference between a frustrating afternoon and a satisfying transformation. We’ve refined our toolkit over years of professional work, and the good news is most of these items are accessible to homeowners too.
The Core Equipment You’ll Need
- Pressure washer — ideally 2,000–3,000 PSI for most patio surfaces
- Surface cleaner attachment — this flat, round attachment delivers even results without streaking
- Stiff-bristle broom or deck brush — for pre-scrubbing stubborn spots
- Garden hose — for rinsing and pre-soaking
- Safe cleaning solution — a dedicated patio or concrete cleaner
- Protective gear — goggles, gloves, and closed-toe shoes
Choosing the correct PSI is critical. Too much pressure can etch concrete, strip the color from pavers, or gouge softer natural stone. For delicate surfaces like sandstone or older brick, we often reduce the pressure and rely more on cleaning solutions and dwell time rather than brute force.
Picking the Right Cleaning Solution
Not all cleaners are created equal, and matching the product to the stain is key. For organic growth like algae and moss, a sodium hypochlorite-based solution works wonders. For grease and oil stains, a degreaser is your best friend. We always recommend eco-friendly, biodegradable options whenever possible, especially if your patio drains into nearby garden beds or lawns.
If you’d rather skip the equipment investment and the guesswork entirely, our team at All In One Pressure Washing Services brings commercial-grade gear and the expertise to match the right method to your specific surface. Sometimes the smartest DIY decision is knowing when to call in professionals.
Step-by-Step Patio Cleaning Process That Delivers Results
Now for the heart of the project. We’ve perfected this process over thousands of jobs, and following these steps in order will give you the best possible outcome. Rushing or skipping steps is the number one mistake we see homeowners make.
- Clear the area completely. Remove furniture, planters, grills, and decor. Sweep away loose debris, leaves, and dirt so you’re starting with a clean slate.
- Pull weeds from joints. Tackle any grass or weeds growing between pavers before you begin, as pressure washing alone won’t fully remove their roots.
- Pre-treat stains and growth. Apply your cleaning solution and let it dwell for 10–15 minutes. This step breaks down grime so the pressure washer does less work and causes less potential damage.
- Scrub stubborn areas. Use your stiff-bristle brush on heavily stained spots, grease marks, and corners where buildup concentrates.
- Pressure wash systematically. Work in overlapping passes, moving in one consistent direction. A surface cleaner attachment produces the most even, streak-free finish.
- Rinse thoroughly. Wash away loosened dirt and cleaning solution, making sure nothing dries back onto the surface.
- Treat the joints. For paver patios, replace any washed-out polymeric sand and consider a weed preventative for the gaps.
- Apply a sealer (optional but recommended). Once fully dry, sealing protects against future stains and makes your next cleaning far easier.
Timing matters here too. We always recommend patio cleaning on an overcast day or in the early morning. Direct sunlight causes cleaning solutions to evaporate too quickly, which can leave streaks and reduce their effectiveness. A little patience during the dwell time pays off enormously in the final result.
One technique we swear by is maintaining a consistent distance between the pressure washer nozzle and the surface. Hold it too close and you risk etching; too far and you lose cleaning power. Roughly 6–12 inches works for most patios, but always test an inconspicuous corner first.
Common Patio Cleaning Mistakes to Avoid
We’ve been called in to repair plenty of well-intentioned DIY jobs that went sideways. Learning from these common errors can save you money, time, and heartache. Patio cleaning is straightforward, but a few missteps can cause lasting damage.
- Using too much pressure. This is by far the most frequent and costly mistake. High PSI can permanently etch concrete, strip paver color, and create an uneven, pockmarked surface.
- Skipping the pre-treatment. Relying on pressure alone forces you to use more power, increasing the risk of damage. Let the chemistry do the heavy lifting.
- Using the wrong nozzle. A narrow zero-degree nozzle concentrates force into a tiny point and will carve lines into your patio. Stick to wider fan tips or a surface cleaner.
- Ignoring drainage and plants. Harsh chemicals can kill surrounding grass and garden beds. Always pre-wet nearby vegetation and rinse it afterward.
- Cleaning in direct sun. Fast evaporation leaves streaks and reduces solution effectiveness.
- Forgetting to reseal. After a deep clean, pavers and concrete are more vulnerable to new stains. Skipping the sealer means dirtier patios faster.
Another overlooked issue is inconsistent technique. When you pressure wash in random, overlapping-but-uneven passes, you can create a “zebra striping” effect where some areas are visibly cleaner than others. This is especially noticeable on large concrete slabs. Working methodically in straight, overlapping lines eliminates this problem entirely.
Finally, don’t underestimate the surface-specific knowledge required. Natural stone, stamped concrete, brick, and composite materials each respond differently. A method that revitalizes one surface could ruin another. When in doubt, we always test a small hidden area before committing to the whole patio.
How to Keep Your Patio Looking New After a Deep Clean
The deep clean is only half the battle—maintaining that fresh look is what separates a one-time project from a consistently beautiful outdoor space. The great news is that ongoing maintenance takes a fraction of the effort once you’ve done the heavy lifting.
Simple Maintenance Habits That Make a Difference
- Sweep weekly to prevent dirt and organic matter from accumulating and staining
- Rinse monthly with a garden hose to wash away early buildup
- Address spills immediately, especially grease, wine, and food, before they set
- Trim overhanging plants that drop leaves and create shade for algae
- Reapply sealer every two to three years depending on traffic and exposure
Sealing deserves special attention because it’s genuinely the secret weapon for long-term patio cleaning success. A quality sealer creates a protective barrier that repels water, oil, and stains. It makes routine cleaning dramatically easier and extends the time between deep cleans. We typically recommend sealing concrete and paver patios after every thorough deep clean for maximum protection.
When to Schedule Professional Deep Cleans
Even with diligent maintenance, we recommend a professional-grade deep clean once a year for most patios—and twice a year in humid or heavily shaded environments where algae thrives. This cadence keeps your outdoor space consistently inviting and prevents the kind of severe buildup that requires aggressive, riskier cleaning methods.
Consider the numbers: a neglected patio can look visibly worn within just one to two years, and severe algae damage can reduce surface lifespan by a decade or more. By contrast, a patio that receives regular care can easily last 25 to 30 years looking great. That’s a tremendous return on a relatively small annual investment of time or money.
We also encourage homeowners to pair patio cleaning with cleaning adjacent surfaces like walkways, driveways, and deck areas. Addressing these together creates a cohesive, polished look across your entire outdoor living space and often makes the most sense from a scheduling and efficiency standpoint.
Transform Your Outdoor Space Starting Today
A deep, thorough patio cleaning genuinely has the power to make your outdoor space feel brand new—no expensive renovation required. By understanding why buildup happens, using the right tools, following a proven step-by-step process, avoiding common mistakes, and maintaining your results with simple habits, you can enjoy a stunning patio for years to come. The key takeaways are simple: match your method to your surface, let cleaning solutions do the heavy lifting, work systematically, and seal to protect your investment.
Whether you decide to tackle this as a rewarding weekend project or you’d prefer to leave it to seasoned professionals with commercial equipment, the results are worth it. If you’re ready to see your patio transformed without the hassle, risk, or equipment costs, we’d love to help. Visit All In One Pressure Washing Services to schedule your deep clean and rediscover an outdoor space you’ll be proud to show off. Let’s bring your patio back to life together.